Step-by-step Tutorial on How to Use the TunePat Tools
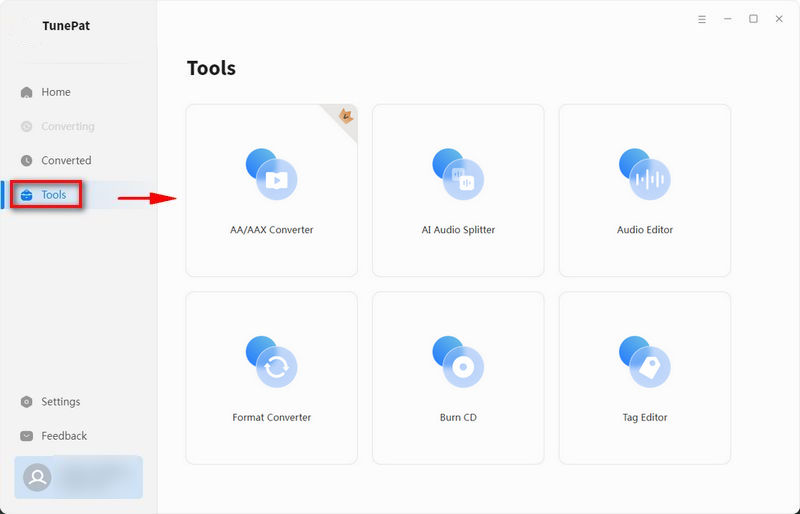
In addition to helping users obtain audio content from various platforms and convert it into common formats, TunePat's audio converter also provides a number of useful gadgets. Access the Tools section by clicking on it in the left menu bar of any TunePat audio converter program interface. The interface of Tools is as shown below:
*Note:
- The AA/AAX Converter is not a free tool and requires a TunePat membership for use.
- The Burn CD tool is only available in the Windows version.
- The AI Audio Splitter is supported by both TunePat Apple Music Converter and TunePat Music One. In TunePat Music One, this module is called AI Lab, which is independent of the Tools module.
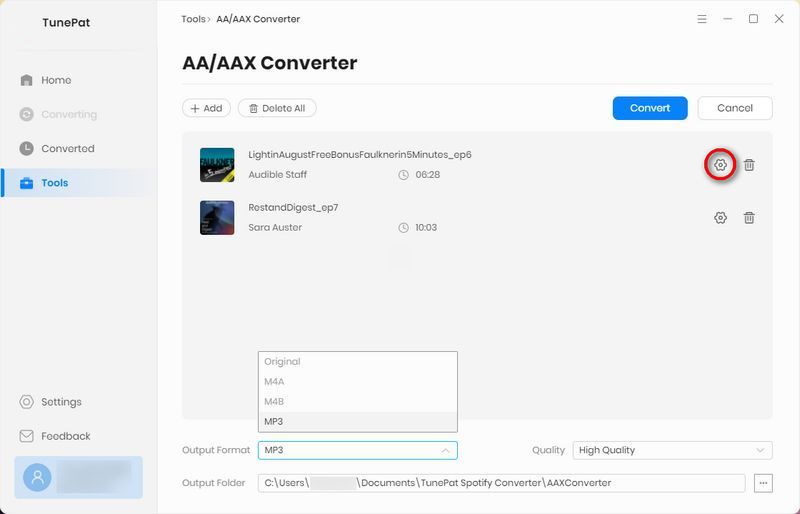
AA/AAX Converter:
The AA/AAX Converter allows you to convert audiobooks purchased and downloaded onto the local computer from Audiblekids, Audible.com, and the iTunes Store to MP3, M4A, or M4B formats for playback on any device. The steps are easy to follow.
Drag files from the local folder to the specified location or click "+ Add" to add the audiobook files you downloaded locally, then select the format, sound quality, and output path. Finally, click "Convert" to begin the conversion process.
Please note:
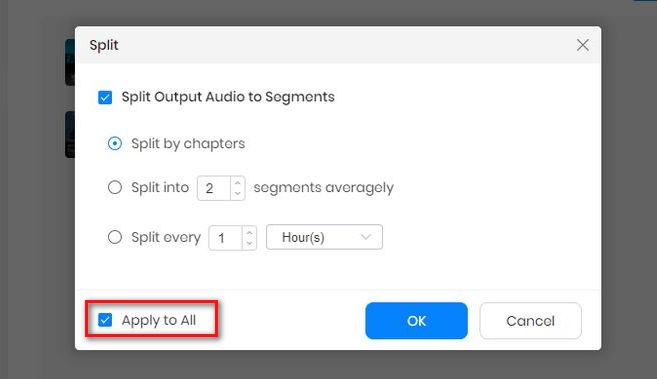
1. To customize the conversion settings of an audiobook you added, simply locate the " " icon on the right-hand side of the title. Select advanced settings to specify how you would like TunePat to split the audiobook, whether it be by chapters, dividing it into X files equally, or splitting it every certain length of time.
2. To apply the same setting to all files when converting multiple audiobooks simultaneously, simply check the "Apply to all" button located at the lower left corner of the Split window.
3. Please note that this tool requires a TunePat paid membership to be unlocked.
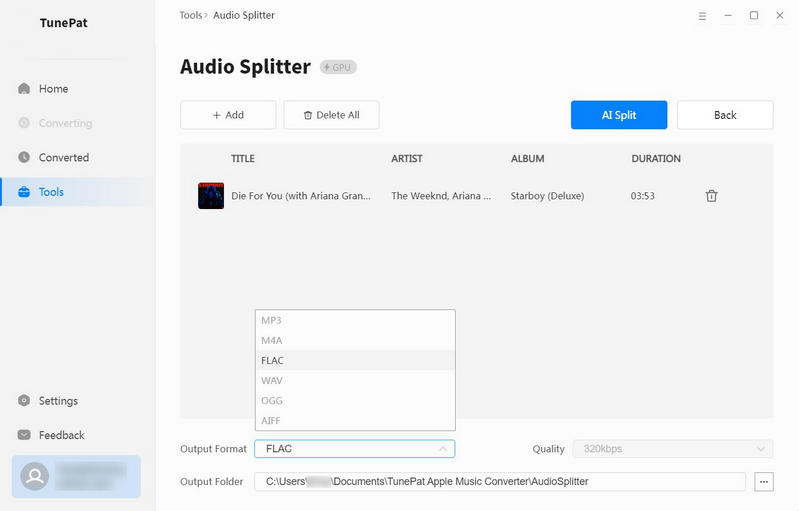
AI Audio Splitter:
The AI Audio Splitter is a specialized tool tailored for the separation of vocals and instrumentals within audio tracks. This advanced technology provides the capability to isolate and extract these components, offering enhanced control over audio content. Before that, you need to install some necessary AI models.
Once completed, drag local files or click "+ Add" to add the audio files you downloaded, then select the format, sound quality, and output path. When you have configured the output preferences, click the "AI Split" button to start the splitting process. The duration will depend on the length of the audio and your computer's processing speed.
Please note:
1. All components of AI models will take up about 3.2G space on your device. Please make sure you have enough space on your disc in advance and wait patiently for a few minutes.
2. For the best separation of vocals from backing tracks, it's advisable to utilize a higher-quality file. We recommend using lossless audio like FLAC, WAV, and ALAC for optimal results.
3. The final result depends on a number of factors, such as the music platform, the genre of the song, the sound quality, the output settings, the device, the network, and so on.
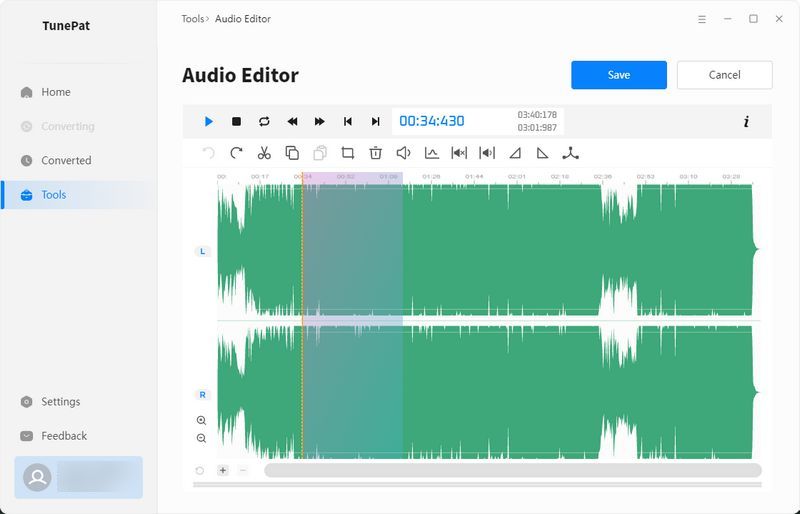
Audio Editor:
The Audio Editor tool facilitates the processing of various audio files. You can import audio files by dragging them directly from the local target folder or by clicking the "Open" button and selecting the desired file.
Once imported, you can select a specific section of the audio and perform necessary operations such as trimming, cutting, copying, and pasting. Additionally, you can apply other audio processing techniques such as gain adjustment, normalization, insertion of silence, and audio fade-in or fade-out. The tool also allows for audio speed changes. When finished, click "Save".
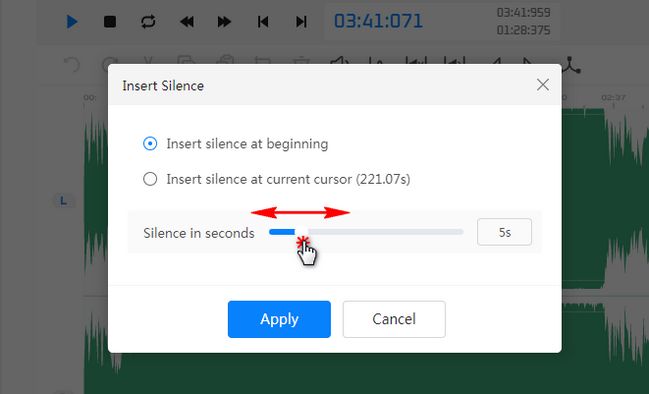
"Insert Silence" option: After clicking this option, you will see a small pop-up window where you can choose to add silence to the beginning of the entire audio file or at the current cursor position. The default length is 5 seconds, and you can freely adjust it, with a maximum length of 30 seconds. Click "Apply" to confirm.
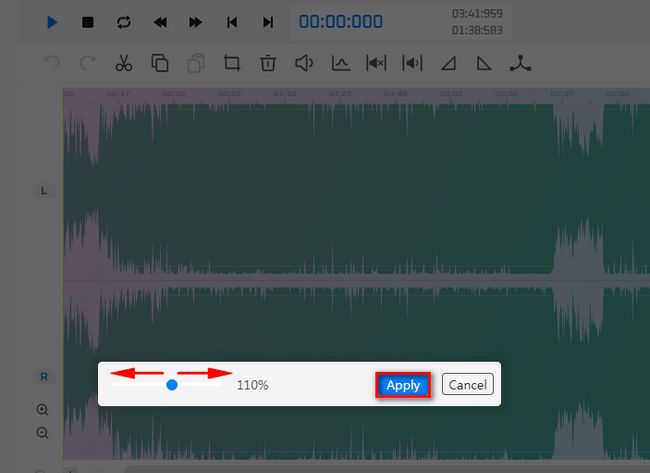
"Gain" option: Gain is used to control the level of the input audio signal. Proper use of audio gain can significantly enhance the clarity and depth of the audio, making your music sound fuller. However, gain needs to be set appropriately; if it's too high, the signal may be distorted, adversely affecting the audio quality. When using the Gain button in TunePat Audio Editor, a draggable bar will appear with a default setting of 100%. You can drag it left or right to make adjustments and then click "Apply" to apply the changes.
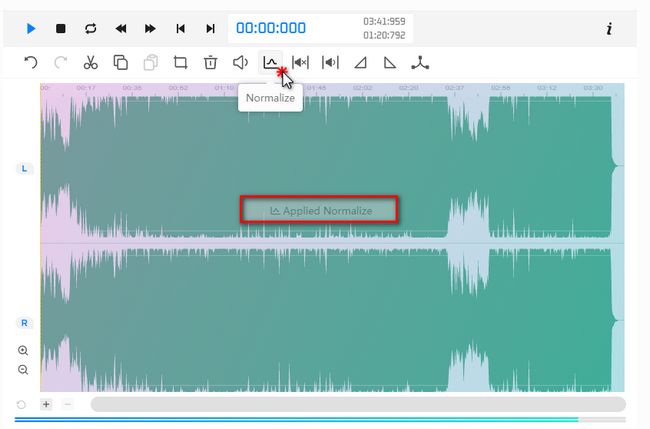
"Normalize" option: The advantage of normalizing audio is that it improves compatibility and sound quality across various playback systems, such as headphones, speakers, and streaming platforms. It also helps prevent clipping and distortion, ensuring clean sound. However, normalization is not suitable for all situations, especially when there are extreme dynamics or intentional volume changes in your audio file. When using the Normalize button in TunePat Audio Editor, the program will automatically analyze and process the audio. Once processed, an "Applied Normalize" prompt will appear.
Format Converter:
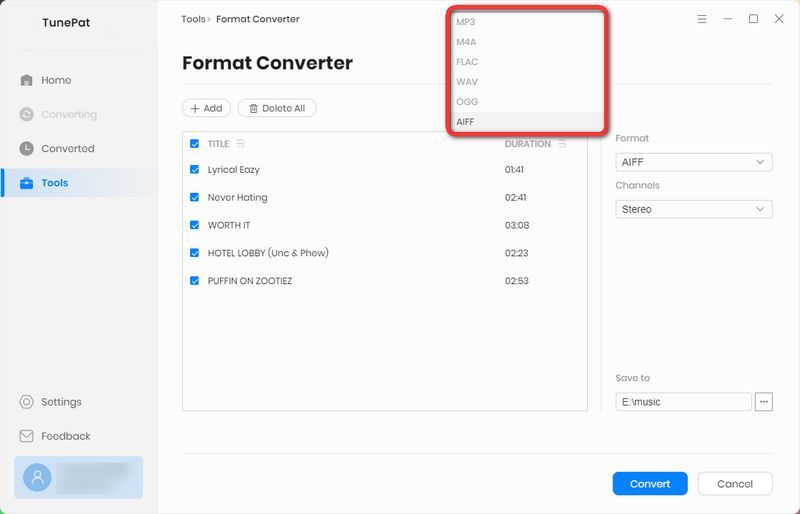
This tool is primarily designed for converting audio formats. To begin, click the "+ Add" button to select a local audio file from your computer. Then, click "Convert" to output it to your desired format. Currently, the supported output audio formats include MP3, M4A, FLAC, WAV, OGG, and AIFF.
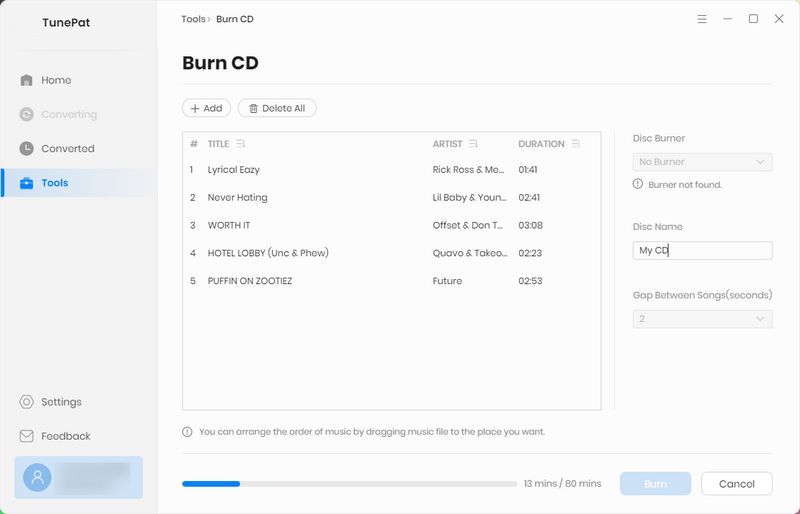
Burn CD:
This module provides a convenient solution for users who wish to burn converted songs onto CDs for storage or gifting purposes. By clicking the "+ Add" button, you can import the songs you have just converted into the list. Insert a blank disc into your CD or DVD burner, and then click the "Burn" button to initiate the burning process.
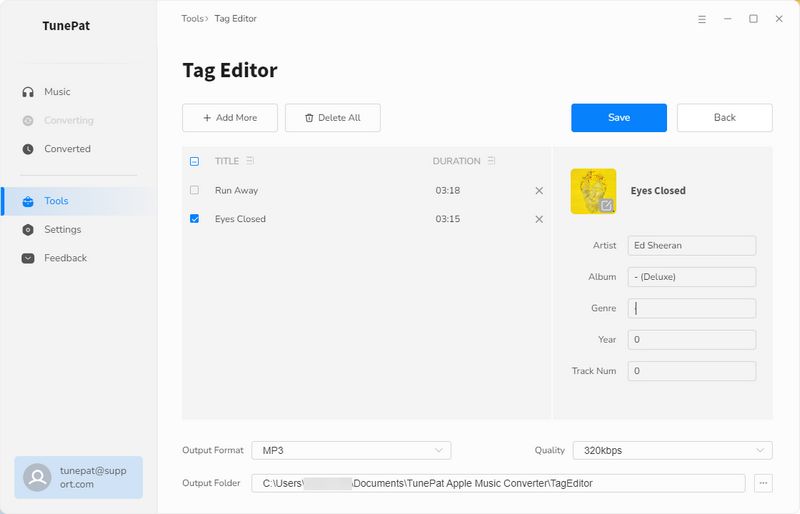
Tag Editor:
In this section, users can modify the tag information of the songs, including artwork, title, artist, album, genre, year, and track number. Once you have made the desired changes, simply click the "Save" button to save the modifications.