TunePat YouTube Music Converter helps you to download YouTube Music from the YouTube Music web player onto a Windows or macOS computer with a Free or Premium account. It can convert YouTube music tracks, albums, or playlists to MP3/AAC/WAV/FLAC/AIFF/ALAC. Here is how to register for the program to unlock all features after purchasing a license and then how to download YouTube Music for listening offline.
1. How to Register TunePat YouTube Music Converter
TunePat YouTube Music Converter is designed based on a YouTube Music web player. You can easily operate the software and convert music without installing any extra apps, including the YouTube Music app. If you are interested in the software, you can click on the Download on the right sidebar to install one. If you think the software is good to use and wish to get access to the full version, you can become a TunePat member and gain free updates and technical support.
Here's how to sign up for TunePat YouTube Music Converter:
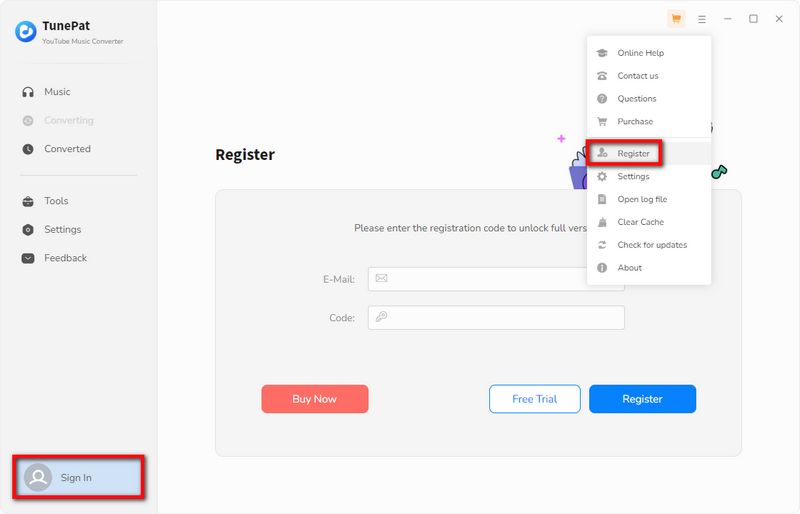
Step 1 Click on the Menu > Log In option to find a pop-up. You should complete the registration process here.
Step 2 Then copy and paste the registration Email and Code into the registration popup Window. Click on Log In button.
Note:
1. The key will be sent to you once you purchased TunePat. If you do not receive the license key after a few minutes, please check your Spam E-mail folder or contact our support team for help.
2. The Windows license can't be used on a Mac or MacBook and vice versa.
How to Use TunePat YouTube Music Converter
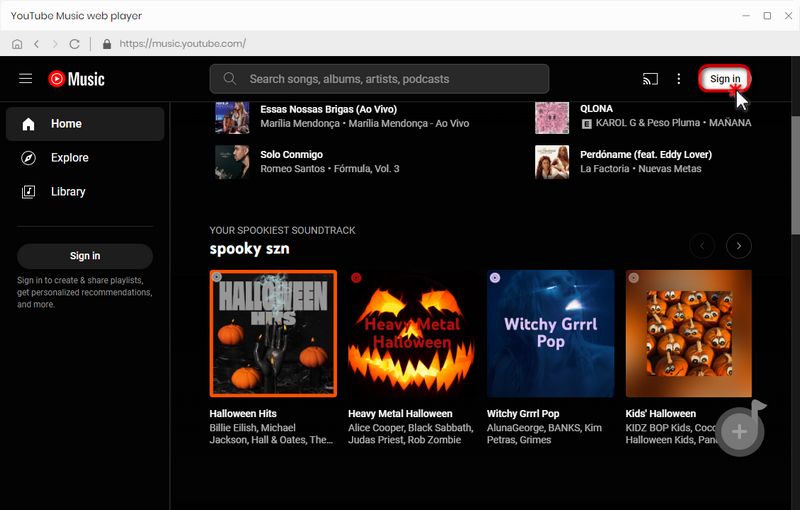
Step 1 Launch TunePat YouTube Music Converter and you will see the following page. Just follow the instructions on the top of the screen and click the "Sign in" button in the upper right corner. Enter your YouTube account information to access the YouTube music library.
(Tip: If you want to access the YouTube Music web player in a new window, click the "Pop out Player" button.)
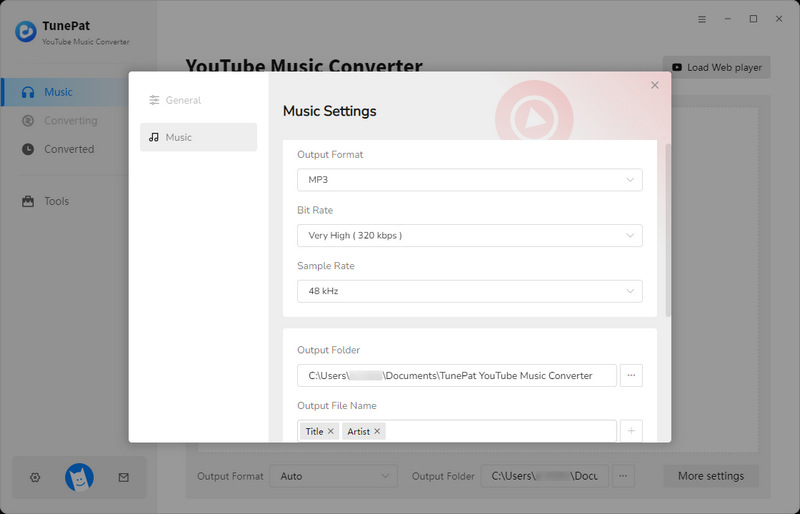
Step 2 After a successful login, you are supposed to finish the output settings before choosing songs to convert. Click on the "Settings option. Here you can customize the necessary parameters, including but not limited to the output format (MP3, AAC, FLAC, WAV, AIFF, ALAC), bit rate, sample rate, output folder, output file name, etc.
Tips: Drag the slider down and you will see the "Save lyrics (if provided)" option. It is disabled by default and can be enabled manually. You can then export lyrics files from YouTube Music in the TXT format.
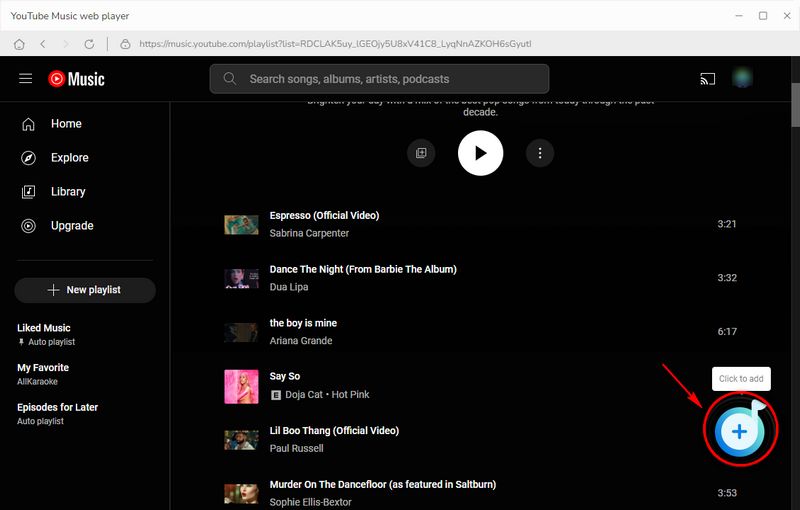
Step 3 Now go to the YouTube Music web player window. Search for or target the titles you wish to convert and download. Open this song, album, artist, or playlist, and then you can see a blue Click to add button on the lower right-hand side. Tap on it. Then TunePat will automatically identify and list all available songs on a pop-up. Tick off what you want manually and choose the Add option.
Note: The Filter Converted button in the upper left corner lets users filter out existing songs in the chosen output folder to avoid duplication.
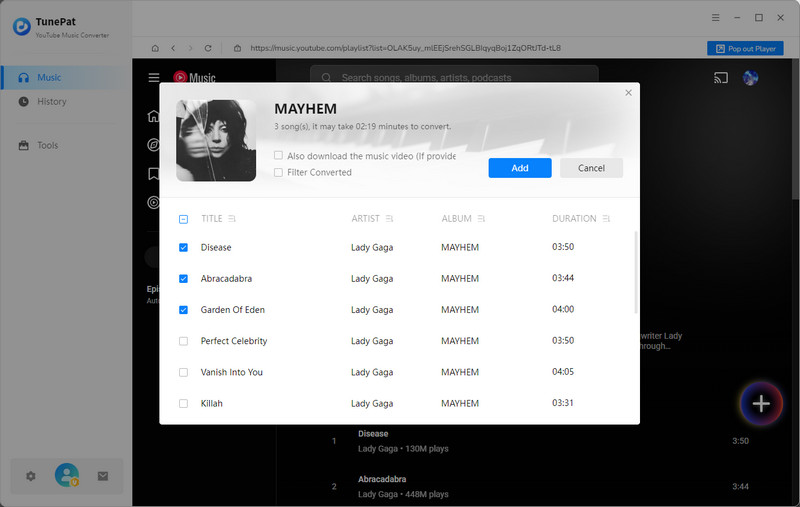
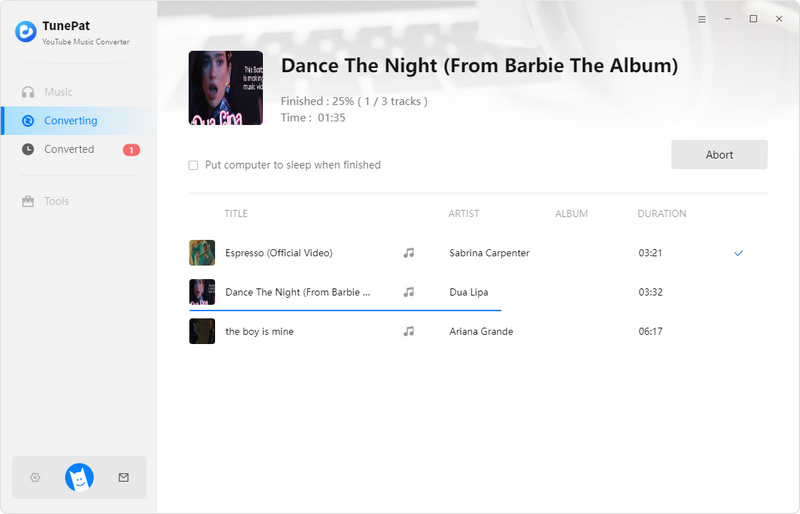
Step 4At this point, the song you selected is loaded into the list on the home page. In this interface, you can see an "Also download the music videos (If provided)" button. This button is off by default. If you need to download music videos, turn on this button (the button will turn green), then TunePat will automatically search and download. The video will be in MP4 format, and the output quality will vary depending on the source file, up to 4K.
In the lower row of buttons, clicking the Convert button will start the conversion process immediately, while the Add More button will bring you back to the web player to continue selecting songs. If you accidentally make a mistake and want to clear the list, click the Delete All button on the far right.

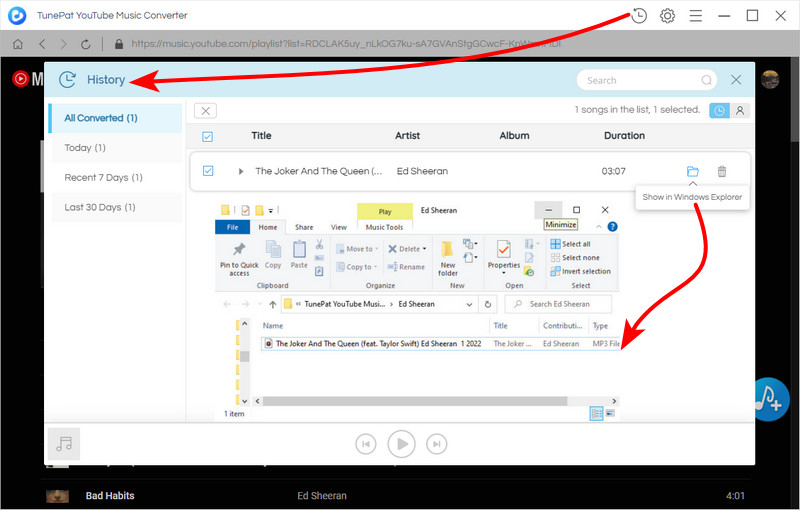
Step 5Click on the History icon to find the well-converted YouTube songs. You can also select songs and transfer them directly to iTunes, burn them to CD, edit their tags as you like, or transfer them to other devices you like.