Top 4 YouTube to iTunes Converters
In the digital age, YouTube Music has become a treasure trove of music, with countless songs, albums, and live performances available at our fingertips. However, many of us prefer organizing our music libraries on iTunes for easy access across devices. Unfortunately, YouTube Music does not have any built-in functionality for exporting your playlists and music collection to another app such as iTunes. To bridge this gap, four YouTube to iTunes converters have emerged as practical solutions.
Want to find a reliable way to transfer your favorite YouTube tracks to your iTunes library? Look no further! In this article, we will explore the benefits of using these converters, discuss their key features, and provide recommendations for the top YouTube to iTunes converters available in the market, offering seamless solutions for enjoying YouTube content on iTunes without limitation.

Part 1. The Best YouTube to iTunes Converter
Despite the fact that a direct YouTube-to-iTunes app is not yet accessible, YouTube audio can be downloaded as iTunes-compatible file formats using third-party software and websites, which can then be imported into iTunes.
TunePat YouTube Music Converter is a leading YouTube to iTunes converter that stands out for its simplicity and efficiency. With its intuitive interface, even novice users can effortlessly convert YouTube songs to iTunes in MP3, AAC, FLAC, WAV, AIFF, and ALAC formats while preserving its original sound quality and ID3 tags at up to 10X speed. Whether you prefer audio-only or full video conversion, TunePat has you covered. With this wonderful tool, you can download YouTube Music at no cost and keep your YouTube Music downloads after the trial period ends.
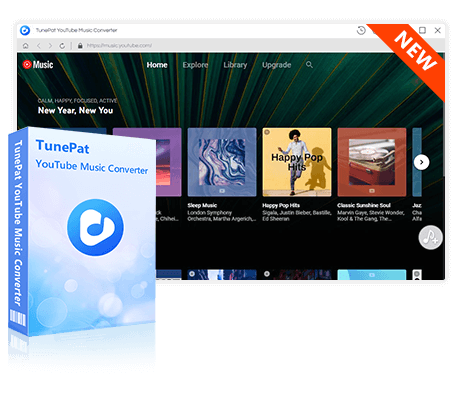
TunePat YouTube Music Converter
TunePat YouTube Music Converter helps you download and convert all YouTube Music songs and playlists to MP3 and other common formats.
Step 1 Open the Built-in TunePat YouTube Music Web Player
Download and install the TunePat YouTube Music Converter first. Two pages will appear when TunePat is launched: the main interface of TunePat and the web player for YouTube Music. By clicking the "Open the webplayer window" button in the top right corner, you can manually launch the web player if it doesn't appear automatically. After that, click "Sign in" and enter your YouTube Music login information.
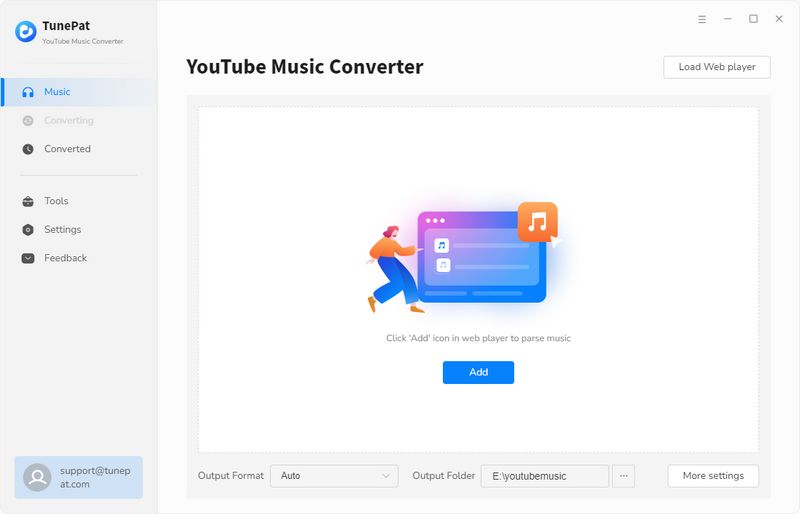
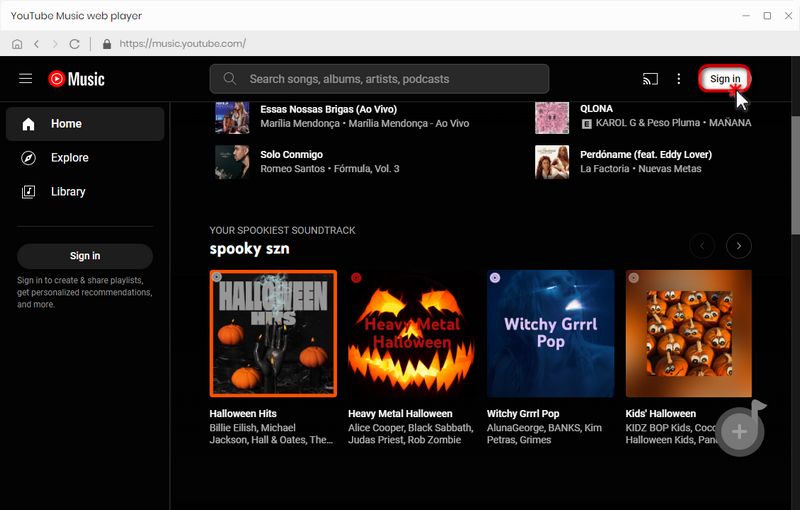
Step 2 Change the Output Format, Quality, and Other Settings
You can modify the output format, output quality, output folder, and other options in the "Settings" module in the bottom-left corner. There are six different formats available in TunePat, and iTunes accepts a number of audio file types like MP3, AAC, AIFF, ALAC, and WAV. Therefore, we'll use "MP3" as an example in this section.
TunePat's Settings has a large range of parameters that you can customize:

Step 3 Add YouTube Music Tracks to TunePat
Click the "Click to add" button at the bottom right after choosing your favorite song, playlist, or album from the YouTube Music web player. Click the "Add" button to add them to TunePat after deselecting the ones you don't want.
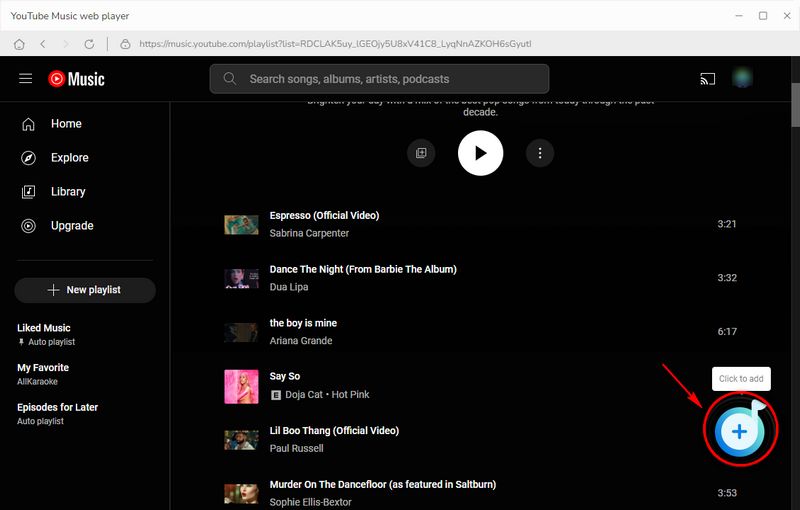
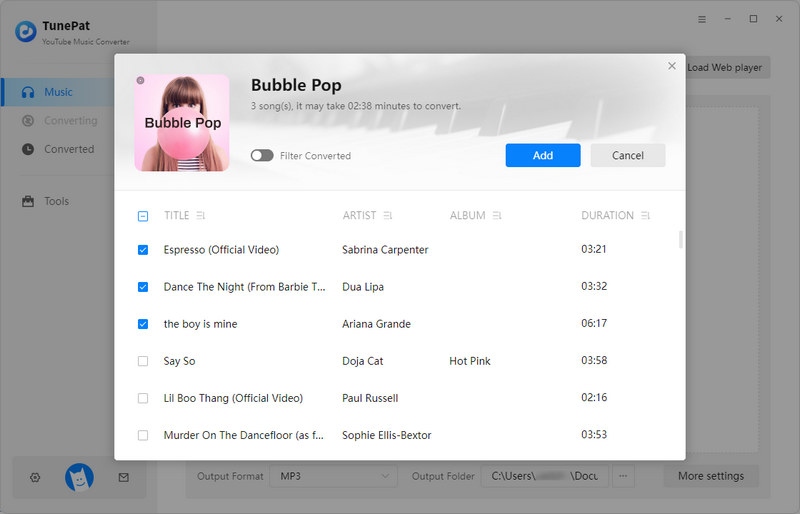
Step 4 Download YouTube Music Tracks to PC
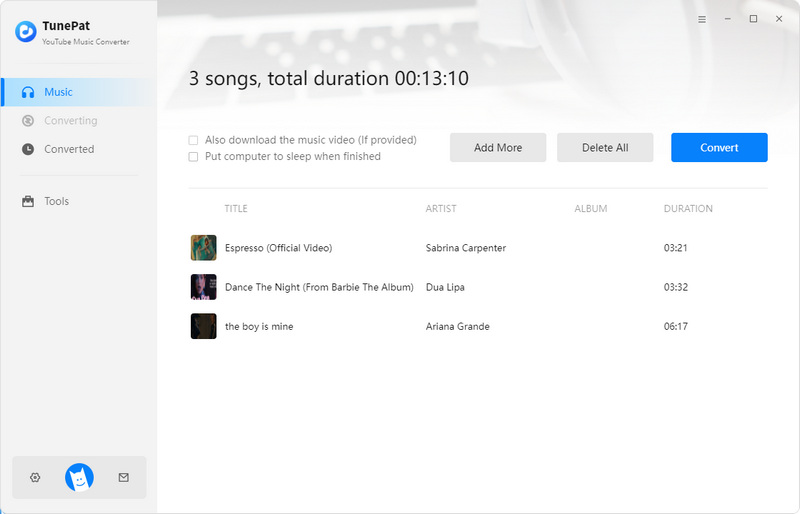
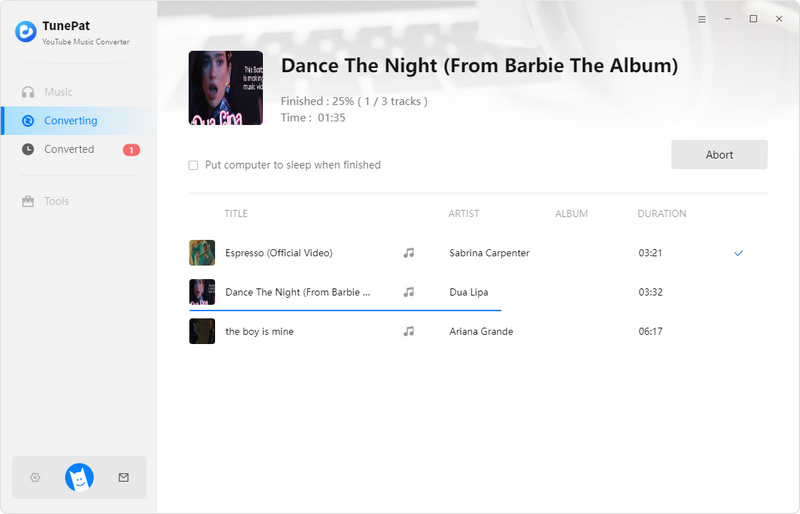
To add additional songs from various YouTube Music playlists to the conversion list, click "Add more" and then press the "Convert" button to begin the conversion right away. They will be read swiftly and downloaded at a 10X faster speed by TunePat.
Step 4 Export YouTube Music to iTunes
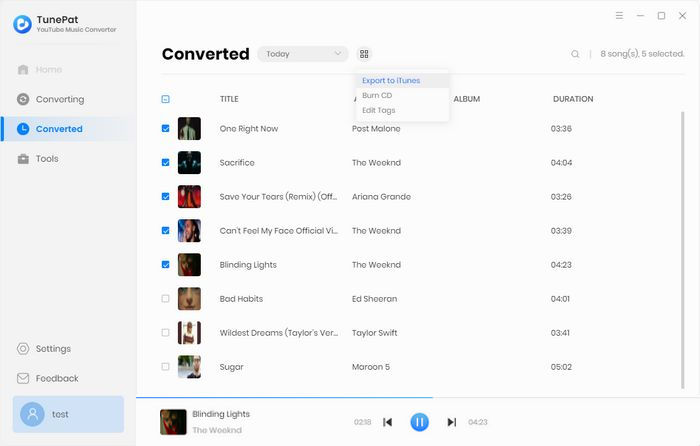
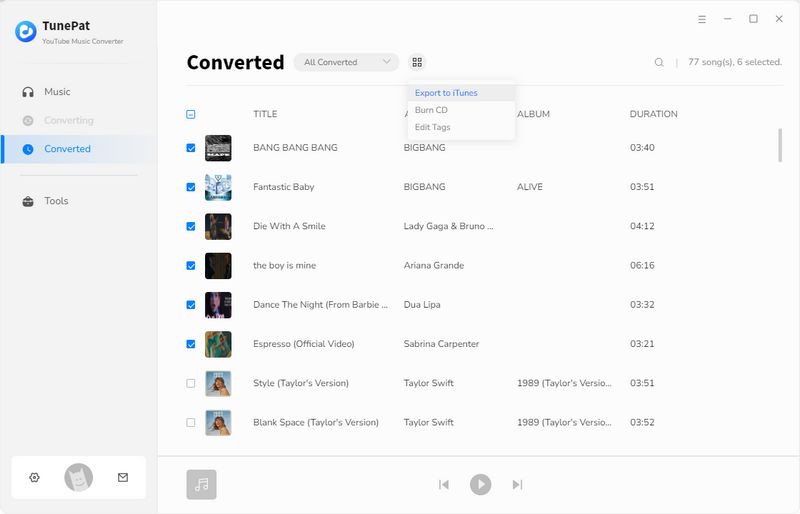
Once finished, the folder storing the downloaded YouTube Music files will pop up automatically and you can browse and play them under the "Converted" module in the top left corner of the screen. Unlike other YouTube Music converters, you can easily export the downloaded music to iTunes directly by clicking on the four-square icon > "Export to iTunes".
Step 5 Enjoy YouTube Music on iTunes After Completing the Exporting
Name the playlist storing the YouTube songs you download and click the "Start exporting" button. TunePat will make a playlist to organize these songs in your library quickly. Attention please. If you accidentally convert YouTube Music to an iTunes-incompatible format, TunePat will automatically skip them for you. Once completed, click the "Launch iTunes" button and you will see your downloaded YouTube Music in your iTunes library.
Part 2. Three Free YouTube to iTunes Converters
There are also some free choices for you. These YouTube to iTunes converters offer a convenient way to expand your music library, save YouTube Music files to any device, and enjoy your favorite songs offline. Unfortunately, there are always drawbacks to free things. For your consideration, we'll list the benefits and drawbacks of each downloader below.
#1: Soundloaders YouTube Music Downloader
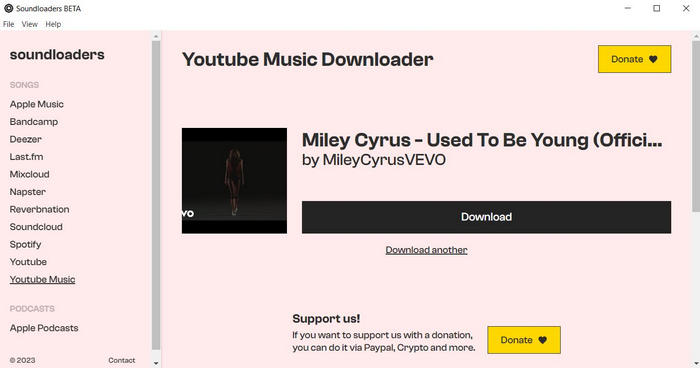
Soundloaders YouTube Music Downloader is a free program to download YouTube Music tracks to MP3 format. With a user-friendly interface, this converter supports downloading YouTube Music and converting them to iTunes-compatible format (MP3) effortlessly. It is simple to use but only has one output format.
Pros:
Cons:
Step 1 Download Soundloaders YouTube Music Downloader on your PC.
Step 2 Copy and paste the URL of the YouTube Music song you want to convert and click the "Download" button below.
#2: Loader.to YouTube MP3 Playlist Downloader
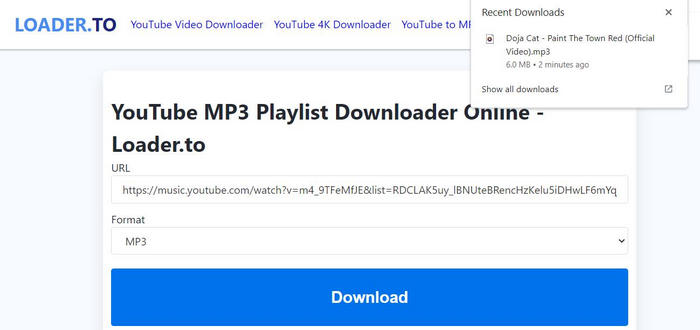
Loader.to YouTube MP3 Playlist Downloader lets you convert YouTube Music tracks to iTunes in just a few clicks known for its simplicity and various output formats. However, it has too much advertising clutter on its page and some users might not tolerate this flaw.
Pros:
Cons:
Step 1 Open the website of Loader.to YouTube MP3 Playlist Downloader.
Step 2 Copy and paste the URL of the YouTube Music song you want to convert and choose the iTunes-compatible output format.
Step 3 Click the "Download" button and close the pop-up ads or web pages.
Step 4 Scroll down the web page and wait for the download. After that, click "Download" again and you will get the downloaded YouTube Music.
#3: FLVTO YouTube Converter
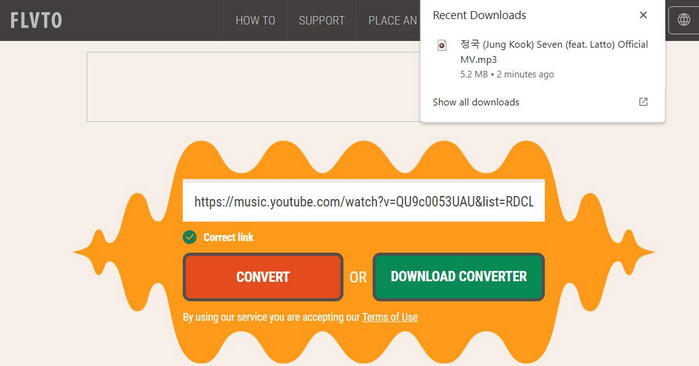
FLVTO YouTube Converter is also a free choice to download YouTube Music songs to MP3 and MP4. It claims to be able to convert music from many platforms to MP3 and MP4. But in fact, links from any platform other than YouTube Music are invalid.
Pros:
Cons:
Step 1 Open the website of FLVTO YouTube Converter.
Step 2 Copy and paste the URL of the YouTube Music song you want to convert and choose the iTunes-compatible output format.
Step 3 Click the "CONVERT" button, and then select "Download". After a web page jumps out, you need to click "Allow" to close that page and wait for the download.
These are some free tools for you to export YouTube Music songs to iTunes easily but they do not support directly exporting YouTube Music to iTunes, unlike TunePat YouTube Music Converter. Therefore, we will share with you the detailed guide to exporting the downloaded YouTube Music to iTunes in the next part. Read on.
Part 3. How to Export YouTube Music to iTunes
Now you can add the music files you downloaded from YouTube music to your iTunes library. Adding YouTube Music to iTunes is not difficult, but it does have some differences between the Win OS and the macOS. Here we will tell you the detailed steps so please follow the procedures according to your needs.
Export YouTube Music to iTunes on Win
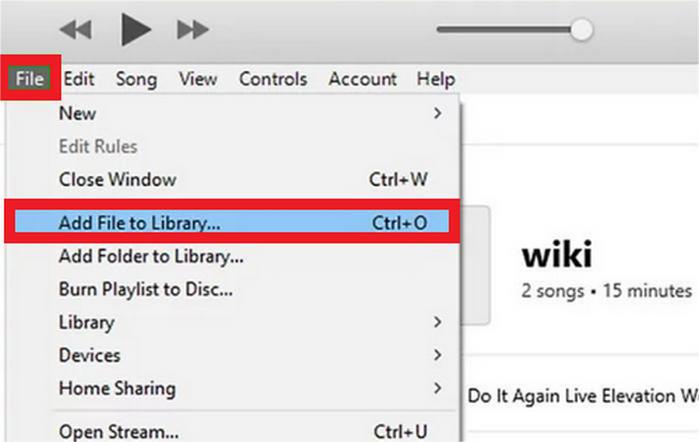
Open iTunes on your Win computer, click "File" > "Add File to Library" or "Add Folder to iTunes". Select the files or folders you want and click "Open" or "Select Folder". The selected files will be added to the iTunes music library.
Or you can open the folder containing the YouTube Music files you want and open the "Library" tab in iTunes. Simply drag and drop the files you want to export to iTunes. As a result, you will immediately add them to your iTunes library.
Export YouTube Music to iTunes/Music on Mac
On macOS 10.15 and above, Apple replaced iTunes with Music, thus we'll describe how to move downloaded music from YouTube to iTunes/Music respectively.
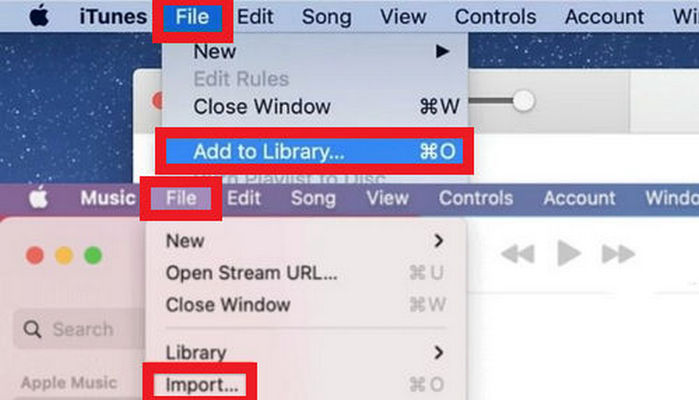
Export YouTube Music to iTunes: Open iTunes on your Mac, click "File" > "Add to Library...". Locate the YouTube Music file folder on your Mac and click "Open". The selected files will be added to the iTunes music library.
Export YouTube Music to Music: Open Music on your Mac, choose "File" > "Add To Library" or "File" > "Import". If you select "Copy files to Music Media folder when adding to library" in Files settings, you will see "File" > "Import". Locate a file or folder, and then click "Open". The selected files will be added to the Music library.
It's simple to export YouTube audio to iTunes, enabling you to listen to your favorite songs on all of your devices. You can download tracks from YouTube Music with many converters recommended in this article, convert them to iTunes-compatible output format, and arrange your music library however you like by following the above-mentioned steps.
Conclusion
Are you tired of searching for a reliable way to transfer your favorite YouTube tracks to your iTunes library? In this article, we share top 4 YouTube to iTunes converters to solve your problem.
These YouTube to iTunes converters offer exceptional features and performance for hassle-free track transfers. Whether you prioritize simplicity, customization, conversion speed, batch conversion, quality preservation, or efficiency, there is a converter——TunePat YouTube Music Converter on this list that will perfectly meet your specific needs. Say goodbye to the complexities of transferring YouTube Music to iTunes and start enjoying your favorite content on iTunes with ease. Start exploring new genres, rediscover old favorites, and curate your personalized music collection on iTunes today!
